· Payback contains all the procedures, formulas, rates and rules for calculating PAYE and PRSI, not only for the current year, but for previous years also.
· Payback is different from most other payroll packages in that it stores all the information that was used to pay an employee for a period, instead of just storing year to date totals. This means that old payslips and reports can easily be produced at any time, even years later.
· This also means that mistakes can be corrected at any time, without having to rely on cumbersome backups.
· Future inspection of your payroll does not depend on reports being printed out.
· When you first start payback, you need to input your company details, then employee details, and then you can process a payroll. Once you’ve finished processing the payroll, you can produce reports (P30s, payslips etc)
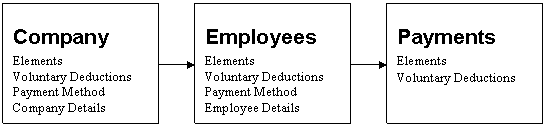
· There are three components Companies, Employees and Payments. These are outlined in the diagram below.
· Payback can be kept up-to-date by ensuring that you’ve registered your copy. Please ensure you register your copy so that you’re on our update mailing list. You can register via our website, www.payback.ie, or by phone, 1800 211 425
The main menu is along the left hand side of the screen. Use this menu to navigate through the different screens of payback. The menu is split into three sections, Main, File and Admin. Under each section are different icons, representing the different screens. To select a section, click on it. (The section’s icons will be displayed.) Click on the icon to enter the screen. When an icon is selected, a blue box is displayed around the icon.
Click the Main section and the following icons will appear
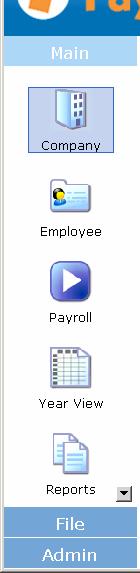 Company
– Company setup screen. Before you can enter any employees, you first have to
set up at least one company. The minimum information you need is the company
name. All company details are on this screen.
Company
– Company setup screen. Before you can enter any employees, you first have to
set up at least one company. The minimum information you need is the company
name. All company details are on this screen.
Employee – Employee details screen. This is where you record all the information about your employees. You need to type in this information before you can run a payroll. The minimum information you need is the employee’s surname. Salary details, PRSI code, Tax credits and Standard Rate Cut off points are recorded here.
Click the File section and the following icons will appear.
Backup – When you wish to backup data, or restore old data, use this icon. There is also an upgrade facility here for copying across your records when upgrading Payback to a newer version.
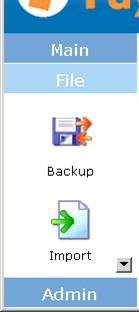
Import – This screen is for importing your tax credits file. The revenue issues a tax credit file to companies.
(Note the button with the arrow on it. This lets you see more icons if the window is too small to display them)
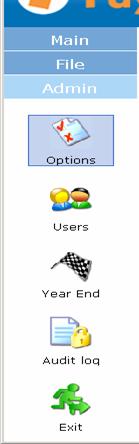
Click the Admin section and the following icons appear.
Exit - When you’ve finished using Payback, click this icon to exit the application.
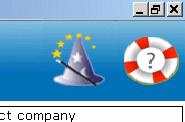 The
Wizard’s Hat icon at the top right of the screen allows the user to enter
Wizard Mode. Wizard mode helps you set up your payroll by asking you a series
of questions.
The
Wizard’s Hat icon at the top right of the screen allows the user to enter
Wizard Mode. Wizard mode helps you set up your payroll by asking you a series
of questions.
Click the Lifesaver icon for help. A help window will appear along the left hand margin of the window, detailing the screen’s main functions.
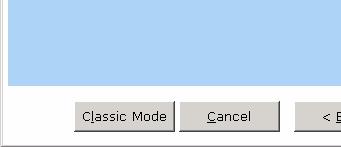 When
Wizard Mode is selected, you can revert back to Classic Mode by clicking the Classic
Mode button at the bottom of the wizard screen.
When
Wizard Mode is selected, you can revert back to Classic Mode by clicking the Classic
Mode button at the bottom of the wizard screen.
![]()
Most screens in Payback have tabs. By clicking on the tabs different information can be viewed.

From Left to Right
Table of Contents – For most reports in Payback, this isn’t used.
Print… - Click this to setup the printer and print a report.
Copy – Copies report data to the windows clipboard. From there it can be pasted into other applications, such as spreadsheets etc.
Find – Finds specific text in a report. Useful for large reports of hundreds of employees.
Single Page – Displays one page at a time.
Multiple Pages – Display more than one page at a time on the screen.
Zoom Out – View more of the report.
Zoom In – Home in on certain areas of the report. (Magnify)
Zoom – Select from the list a zoom percentage.
Previous Page – Go to the previous page in the report. Disabled if you are on the first page of a report.
Next Page – Go to the next page of the report. Disabled if you are on the last page.
Some reports in Payback are based on Pay Periods, others are monthly and some are annual reports.
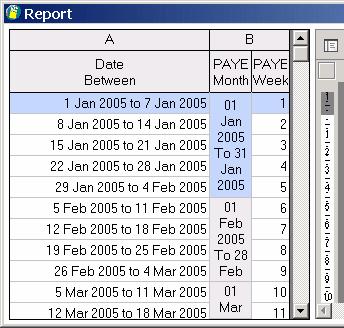 Click
on the period (PAYE Week) to select the period to display the report for. The
row will true blue to indicate that the period has been selected. In the figure
opposite, period one has been selected.
Click
on the period (PAYE Week) to select the period to display the report for. The
row will true blue to indicate that the period has been selected. In the figure
opposite, period one has been selected.
If you are paying your employees fortnightly, every second row will be greyed out. You won’t be able to select these greyed out rows.
For four-weekly paid employees, you will only be able to select every fourth week. The other periods will be greyed out.
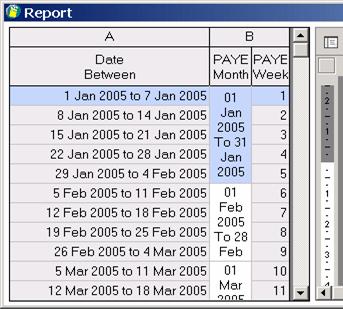 Certain
reports (such as P30s) are calculated on a monthly basis.
Certain
reports (such as P30s) are calculated on a monthly basis.
To select a month, click on the PAYE Month column. The report will be based on the calendar month; payments made from the first day of the month to the last day of the month. NOTE that the ‘Date Between’ Column will sometimes have a few days of the next month (29 Jan to 4 Feb in figure opposite) the actual report will run only for the month of January. The ‘Date Between’ column can be largely ignored.
At the top of most screens in payback are buttons. Here is a short description of what each these do:
![]()
Add New Company – Click this to add a new company. The details at the bottom half of the screen will blank out (if you had already selected a company), ready for you to key in your company information. Click Update Company once you’ve finished inputting the details. Click Cancel if you change your mind, and no longer wish to set up a new company at this time.
Update Company – If you have already set up a company, and wish to change some of the details, and then select the company from the company grid, make the changes, and then click Update Company. This button will save your changes.
Delete Company – Select a company from the grid, and click Delete Company if you wish to permanently delete the company. You will only be able to delete companies with zero employees. This is a safety feature to prevent loss of data. (NOTE: You may have to delete all the employees of a company first, before you can delete the company. Only employees who have had no payments processed can be deleted, so you may also have to rewind all the pay periods for each of the employees)
Cancel – This button appears when you are adding a new company. Click Cancel if you change your mind about adding a new company.
![]()
Add New Employee – Click this to add a new employee to the company you’ve set up (the company name is displayed in the company drop down list at the top of the screen). The details at the bottom half of the screen will blank out (if you had already selected another employee), ready for you to key in your employee’s information. Click Update Employee once you’ve finished inputting the details. Click Cancel if you change your mind, and no longer wish to set up a new employee at this time.
Update Employee – If you have already set up an employee, and wish to change some of the details, and then select the employee from the employee grid, make the changes, and then click Update Employee. This button will save your changes.
Delete Employee – Select an employee from the grid, and click Delete Employee if you wish to permanently delete the employee. You will only be able to delete employees who have not been paid. This is a safety feature to prevent loss of data. (NOTE: You may have to rewind all the pay periods for each of the employee before deleting)
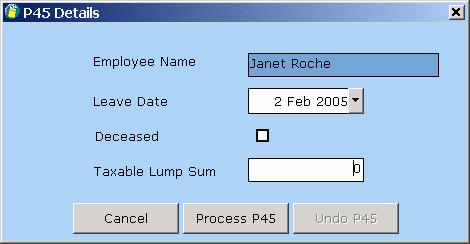
P45 – If an employee leaves the company, you can issue a P45. Click this button and the P45 screen will appear.
Cancel – This button appears when you are adding a new employee. Click Cancel if you change your mind about adding a new employee.
![]()
Save – The pay details can be saved without having to process a period. This function is useful if you wish to input all the details of each employee first, before processing the payment. Saving the pay details does not process the period.
Pay – When you are happy that the payment details are correct, click this button to process the payment for the highlighted employee. Only the selected employee will be paid. Once paid, the employee details will turn from bold to normal text on the employee grid.
NOTE: Clicking the Pay button doesn’t transfer any money. If you make a mistake, you can easily undo it.
Pay All – When all of the employees have the correct payment details, click this button to process the period for all the listed employees. The employee details in the employee grid will change from bold to normal text. This indicates that they’ve been paid.
Rewind – This undoes a processed period for the highlighted employee. It will only reverse the pay for the currently selected employee. Only the last period paid can be rewound. This is because of the way pay is calculated (on a cumulative basis). Refer to the history tab at the bottom half of the screen to see which periods have been processed.
![]()
Save – The pay details can be saved without having to process a period. This function is useful if you wish to input all the details of each employee first, before processing the payment. Saving the pay details does not process the period.
Pay – When you are happy that the payment details are correct, click this button to process the payment for the highlighted employee. Only the selected employee will be paid. Once paid, the employee details will turn from bold to normal text on the employee grid.
NOTE: Clicking the Pay button doesn’t transfer any money. If you make a mistake, you can easily undo it.
Rewind – This undoes a processed period for the highlighted employee. It will only reverse the pay for the currently selected employee. Only the last period paid can be rewound. This is because of the way pay is calculated (on a cumulative basis). Refer to the history tab at the bottom half of the screen to see which periods have been processed.
![]()
Run Report – Select the report you wish to view from the bottom half of the screen. Click Run Report to view the report. NOTE: This doesn’t print the report. To print the report, click Print… at the top of the preview window. (See report tool bar)
Printer Setup – This displays the windows printer dialogue box. Use this to change your printer settings.

![]()
Update – To save any settings, including registration details, click the Update button.
![]()
Add New User – If more than one person is going to use Payback, additional users can be set up. To keep payback secure, each user can have a password. Any actions performed by the user are recorded in the audit log. Click Add New User to set up a new user. The details at the bottom half of the screen will blank out, ready for you to key in the user’s information. Click Update User once you’ve finished inputting the details. Click Cancel if you change your mind, and no longer wish to set up a new user.
![]()
The basic operation of Payback follows standard Windows practice.
To enter or edit an item of data, click the item and enter or edit the item. When the item is selected, the data will be highlighted.
Where a date is required, you can enter it in a variety of formats. Dates will be automatically converted to dd MMM yyyy. For example, 1/12/04, 1-12-04, 1/dec/04 will all be converted to 1 Dec 2004.
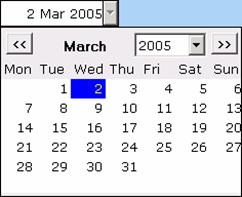
You can also use the calendar to select a date:
Click on the down arrow next to the date and a calendar will appear. To change the month, click << to go back, or >> to go forward. To select a year, use the drop down year list.
Right clicking on an item of data will display the windows context sensitive menu.
Ctrl+C will copy selected data to the clipboard and Ctrl+V will paste data from the clipboard to the current cursor position. Ctrl+X is used to cut, and Ctrl+Z is undo.
Pressing Tab will move the cursor to the next field.
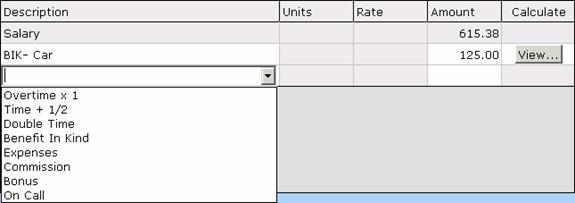
Grids in payback behave in a similar way to those in popular spreadsheet applications. To enter or change data, click on the grid. Cells that are greyed out are protected – you won’t be able to edit this information. To add a new row to a grid, click on the last row of the grid. A cursor will appear in whatever cell you clicked on. If you clicked on the description column, a drop down list will appear, with a down arrow at the right hand side. Click this arrow to see a list of entries (see figure above). Click on an entry to select it.
NOTE: Whenever you finish entering a new row, Payback will automatically add a new blank row to the bottom of the grid.
Certain rows in the grid (Benefit In kind, Holidays and Disability Benefit) will have a View… button in the right hand column. Click View… to see more information about how this entry is calculated.
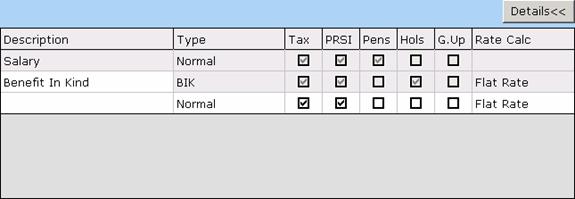
To see how entries in the grid are taxed etc, click on the Details>> button at the top right of the grid.
Click on the check box to tick or unselect.
Lists are often displayed within payback, such as a list of employees or companies. To select a company or employee, click on the appropriate row of the list. The row will be highlighted in blue to indicate that it has been selected.
Lists can be easily sorted in Payback. Just click on the column heading that you wish to sort by. The column heading will be highlighted in blue to indicate that the list has been sorted. Clicking a heading twice will toggle the list from ascending to descending (or alphabetical; ‘a’ to ‘z’, to reverse alphabetical; ‘z’ to ‘a’.)
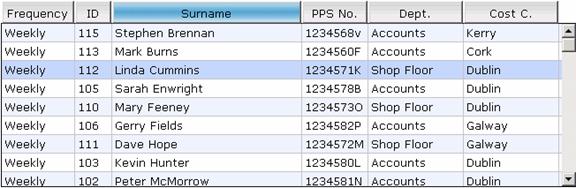
The above list of employees above has been sorted alphabetically by surname. ‘Linda Cummins’ has been selected.

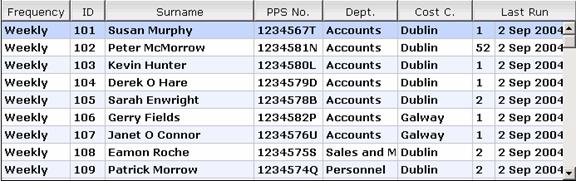
In this example the surname heading was clicked twice to sort the list from ‘z’ to ‘a’. ‘Kevin Hunter’ has been selected.
Lists can be filtered. This is important if there are a large number of employees. Use the drop down combos to filter the list.

This displays only all people who are paid weekly:
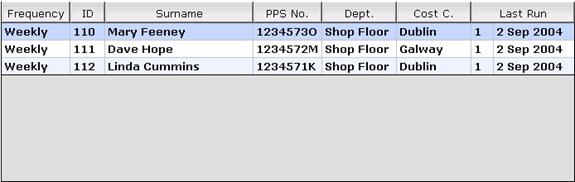
This list has been filtered by the Department.
![]()
All employees in the ‘Shop Floor’ Department have been listed
NOTE: Filtering lists is especially important when running reports.
Sometimes in payback you will notice a down arrow next to a text box (like when entering a date).
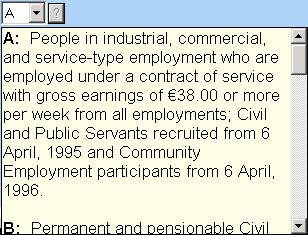
Click on the question mark to display further information about the PRSI classes. Note that you only have to select the main class (such as ‘A’ etc), Payback will automatically select the subclass (‘A1’, ‘A2’ etc).
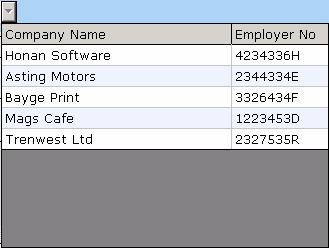
To select a company click on the down arrow, and select the company from the list that appears by clicking on the appropriate row.
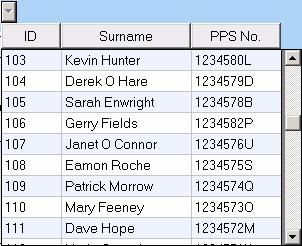
Click on the down arrow to select an employee. The employee list can be sorted by clicking on the column headings (‘ID’, ‘Surname’ or ‘PPS number’)
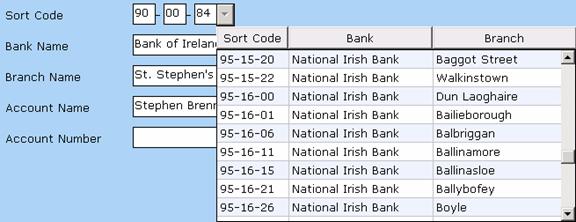
Whenever you have to enter bank information, such as sort codes etc, Payback offers a facility where you can search for the bank. Click on the down arrow next to the sort code to display a list of banks. The list can be sorted by clicking on the column headings. When a bank is selected, (by clicking on the appropriate row) the ‘Sort Code’, ‘Bank Name’, and ‘Branch Name’ fields are automatically filled in.
You can also just type in the sort code directly, without clicking the down arrow. If Payback finds the bank relating to the sort code you entered, it will automatically fill in the ‘Bank Name’ and ‘Account Name’ fields.